Hand built bespoke bicycle frames in the heart of the Wiltshire countryside - dmoframeworks@gmail.com.
Subscribe to email up-dates (no junk mail or third parties I promise) for regular up-dates on the development of DMO Frameworks!

Saturday, 20 April 2013

Bespoked Bristol 2013 - The Launch of DMO Frameworks.....

Well, after so much prep and anticipation, the Bespoked Bristol show 2013 has come and gone - so now its time for a quick review and a look at some more pics...

I set up the stand on Thursday, which on reflection was very much ahead of the game - with some people still yet to arrive at 2pm on Friday afternoon!!

The press and industry insiders were released upon the show at 3pm - this included the judges who would look at all of the bikes on show and choose the winners of the much coveted awards.

It was very encouraging to see some legendary frame builders in attendance, and I was very pleased to receive the following feedback on the bike from none other than Dave Yates "it's very nice, an impressive first build". Well, what more could I have wanted from the show than recognition of that calibre!!

So far the frame has been featured on the following websites and forums:

Singletrack - http://singletrackworld.com/2013/04/missed-bespoked-bristol-heres-the-report/

Road CC - http://road.cc/content/news/80868-bespoked-bristol-2013-sneak-peek-video-donhou-feather-paulus-quiros-rourke

Headset Press - http://www.headsetpress.co.uk/bespoked-bristol-2013-photos-part-2/

Wildcat Bags - http://wildcatgear.co.uk/2013/04/02/bespoked-bristol-2013/

I would have posted a review sooner, but to be perfectly honest its all been a bit of a whirlwind since the show. I have been very flattered indeed to have quite a bit of interest in the frames - which has come as quite a surprise.

As such I'm currently quoting on a few frames, one of which will hopefully be something a bit special for next years show!!

Anyway, please see below for some of the 'studio' shots of the DMO Element at Bespoked 2013 - I hope you like them!!

Cheers,

Olly

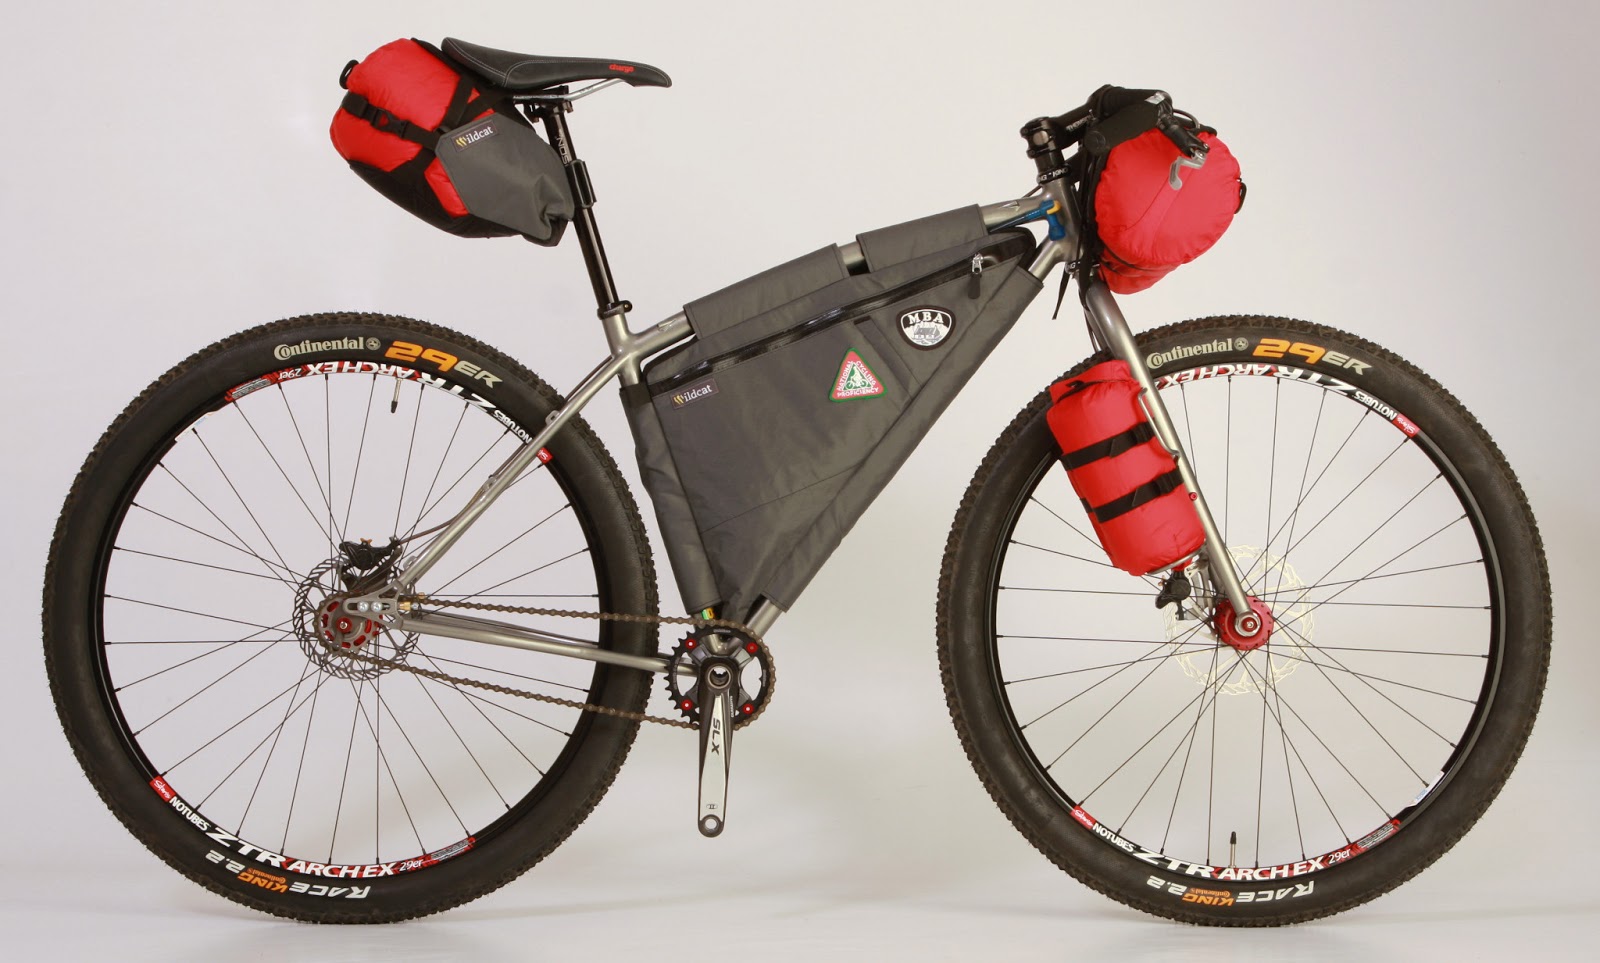
DMO Element - Full Bivvy Spec
DMO Element - Conventional Ride Spec


DMO Element - Dropout Detail
DMO Element - Headbadge Detail
DMO Element - Front View


Saturday, 6 April 2013

Some pictures to whet those custom bike frame appetites......

 Just to whet your guys appetites before the Bristol Bespoked show next weekend - here are some more pictures of the finished frame - hope you like them!


Wednesday, 27 March 2013

Just couldn't resist some snowy bivvying!

For fear of missing the chance of taking some snowy photos of my bike in full bivvy spec I made a rushed outing yesterday.

With the help of Paul Pomfret I managed to get some ace pics - please see below for a couple of these.


Sunday, 24 March 2013

Weclome to the DMO Element.............

It has been a while in the making but today I finished the build of the DMO Element frame number 0001.

DMO Element 0001
I'd like to take this opportunity to thank the following people for their help and support while building my first frame:

Andy at Pipecraft - for help with forming the top tube (http://www.pipecraft.co.uk/).

Jeff at JACS - for his help with shaping the seatstay bridge and curved handlebars (http://www.jacsuk.com/).

Simon and the team at Blade Engineering - for their help with waterjet cutting my headbadge (http://www.blade-engineering.co.uk/blade-engineering.co.uk/HOME.html).

Reynolds Tubing - for all their technical support in helping me choose the right tubes for my frame and answering my seemingly endless barrage of questions! (http://reynoldstechnology.biz/).

Jason Rourke at Brian Rourke Cycles - for general frame building technical support and for painting the first frame (http://www.brianrourke.co.uk/).

Beth and Ian at Wildcat Bags for supplying a set of custom bags for the Element (http://wildcatgear.co.uk/).

And finally to my friends, family and fiancee Kate for putting up with me constantly talking, dreaming and, er well, living bikes!!

Well, here's to seeing everyone at the Bristol Bespoked Bike show in a few weeks time (12th - 14th April, http://www.bespokedbristol.co.uk/) to check out some lush bikes and hopefully sample some splendid real ale!!

Wednesday, 13 February 2013

DMO Developments.....

So while the frame has been off with Brian Rourke Cycles for painting there have been various other developments with other aspects of the frame and custom bags.

First up I finally managed to build some tooling to accurately form the headbadges around. You'll notice that the letters dmo have been cut into the stainless steel sheet - this was done for me by Simon at Blade Engineering in Chippenham (http://www.blade-engineering.co.uk/blade-engineering.co.uk/HOME.html).

Couldn't resist getting the "Made In England" in the shot too - from the side of my great grandads vice no less!!
 
Next up I got the sliding dropouts back from hard anodising, I really like the look of these (which I think will look good on the graphite grey frame) plus hopefully they will not gall up over time where the quick release nuts locate.
 

Finally, and quite possibly most excitingly, Beth from wildcat bags sent me the picture below of my finished frame bag - I think this is going to look ace on the frame at the show - check out Wildcat at - http://wildcatgear.co.uk/.

You'll notice I sent some badges to Beth to be sewn onto the bag - one is the Mountain Bothy Association (http://www.mountainbothies.org.uk/) and the other is my original cycle proficiency badge (I think from when I was 10 years old!!!!).


I am hoping to receive the painted frame back by the 22nd of Feb, in the meantime I am knocking up some prototype swept back handlebars.

Tuesday, 29 January 2013

The final injury (hopefully) - and the frame is done!!

So this weekend I added the finishing touches to the frame - but not before managing to set the workshop on fire!!!

There I was happilly brazing away when I thought I heard something drop on the floor behind me - I turned around - and nothing. So I continued to braze away.

Then I felt something drip on my back, and seeing as it was raining and the workshop roof isnt the most leakproof of roofs I thought nothing more of it - braze away I did.

Then finally stuff started to drip on my head, so I looked up and to my amazement an old tarpaulin was a blaze in the roof space and the dripping was molten plastic dripping on me!! Now the injury - unfortunately when I looked up to see where all the drips were coming from I got one right on the nose!!!

It turns out that I must have waved the acetylene torch a bit too close to the sheeting and set it alight!

Anywho - enough of all that - onto the exciting bit - I shipped the frame to Brian Rourke cycles this afternoon - result!!


Hopefully, in a little over three weeks time I will receive the painted frame back and be able to build the bike up.

In the meantime I have some prep to do for my stand at the Bespoked show and the headbadge to finish off.

Saturday, 26 January 2013

The highs and lows of building the DMO element..........

So the week just gone has seen the highest highs and the lowest lows yet of my frame building experience...

Last Saturday I was happily brazing away, adding the final finishing touches to the frame when I rather unfortunately managed to stick a red hot brazing rod to my lower lip - to date this is the single most painful injury I have sustained whilst building the Element frame.

Having finished the brazing it was time for a final fettle of each of the joints, 7 hours later I had a frame which was looking pretty much done. Next up it was time to think of how to fix the misshapen headtube - a job which if I'm perfectly honest I had been putting off!

So to try to re-shape the headtube I decided to make a stainless steel bung which was .25mm undersize - which I could then press into the headtube from each end.

So I made the bung at work and then plucked up the courage to take it out to the shed and try to re-shape the headtube.

To start with I caked everything in copper slip and then found out that the headtube wouldn't fit in my vice! So, essentially in desperation, I dragged the lump hammer out of my toolbox and went to work. To my amazement the bung went in really easily and square. Next up was to get the bung out - and again, to my surprise it came out pretty easily - why had I put off doing this for so long - it was easy!!

Next up I had to re-shape the lower end of the headtube. Same again the bung started going in easily, but then I heard a weird ringing noise. Another hit, another resonance of this weird noise - then my heart sunk. I've broken one of the internal cable routing's off in the top tube %$^&***&&^!"£$!!! - I thought.

By this point I had gone so far so my only option was to continue. The bung again came out easily, but while I was knocking it out something metallic hit the floor - by this point I was starting to think I must have done something bad to someone in a previous life!! 

I thought I had knocked off one of the braze ons - but a quick inspection showed them to all be still in place. Then I looked at the frame and noticed one of the bottle cage cap screws had fallen out - and then it dawned upon me - the resonating noise must have been the capscrew loose in its boss - happy days - the internal cable routing's had not broken!!

As it turned out the press tool worked a treat and I now have a headtube round enough to press the headset into - result.

All that needs doing now is a final fettle and polish and shot blast ready to send to Brian Rourke cycles for painting.